Senior Home Safety: A Room-by-Room Guide
One in four older adults falls each year in the United States, and 60% of these falls happen in the bedroom or bathroom.
These aren’t freak accidents, they’re preventable incidents caused by everyday hazards hiding in plain sight.
The good news? Small, affordable changes can dramatically reduce fall risk while helping seniors maintain independence in their own homes.
This guide walks through your home room by room, identifying specific hazards and practical solutions that make a real difference. Because staying safe at home isn’t just about preventing falls, it’s about preserving dignity, independence, and quality of life.
1. Why Small Changes Make a Big Difference
Let’s look why these modifications matter beyond just fall prevention:
Independence matters more than you think. Staying home saves an average of $60,000 compared to assisted living costs. But the real value isn’t financial, it’s the ability to wake up in your own bed, cook your own meals, and maintain your own routine.
Falls have lasting consequences. Beyond the immediate injury, falls create a psychological barrier. After one fall, many seniors develop a fear of falling again, leading them to limit their activities. This reduced movement actually increases fall risk while decreasing overall health and cognitive function. Creating a safe environment breaks this cycle.
Modern solutions don’t look institutional. Today’s safety features blend seamlessly with home decor. Grab bars come in brushed nickel and oil-rubbed bronze. Motion-sensor lights are sleek and unobtrusive. You’re not creating a hospital room, you’re creating a safer version of the home you already love.
The most effective approach? Start with the highest-risk areas and work outward. Let’s begin where the statistics tell us to focus first.
2. Bathroom: Your Highest-Priority Room
The bathroom accounts for the majority of home falls among seniors, and it’s not hard to see why. Wet surfaces, frequent position changes (sitting, standing, bending), and often cramped quarters create a perfect storm of fall risk.
Install grab bars strategically. The most important safety upgrade you can make costs less than $100. Install grab bars next to the toilet and inside the shower or tub. The key word is “install”: suction-cup versions aren’t strong enough for actual support.
Mount bars securely into wall studs at 33-36 inches from the floor. Modern grab bars look like towel bars, so they don’t announce “elderly person lives here.”
Address slippery surfaces comprehensively. Place non-slip bath mats both inside and outside the shower or tub. You need secure footing when stepping out onto wet feet.
If you have a bathtub, consider adding textured adhesive strips to the tub floor. These small decals provide traction without the trip hazard of a loose bath mat.
Upgrade your toilet area. A raised toilet seat with armrests makes sitting and standing significantly easier and safer. This single modification can mean the difference between needing assistance and maintaining bathroom independence. Pair it with a nearby grab bar for additional support.
Rethink your shower setup. A handheld showerhead with an adjustable-height slide bar allows you to shower while seated if needed, without expensive renovations.
If you’re ready for a bigger change, walk-in showers with built-in seating eliminate the dangerous step over a tub edge entirely.
Get the lighting right. Bright, warm lighting prevents the shadows and glare that can obscure depth perception.
Add a motion-sensor nightlight that automatically illuminates the path from bedroom to bathroom. Crucial for those 2 AM trips when you’re groggy and your eyes haven’t adjusted to darkness.
Bedroom: Creating a Safe Sleep Environment
Your bedroom sees you at your most vulnerable as you emerge from sleep and move in in darkness. Focus on the path from bed to bathroom and the area immediately around your bed.
Light the way automatically. Motion-sensor nightlights placed at floor level create a lit pathway without the harsh overhead lighting that fully wakes you.
These battery-operated lights cost $15-20 each and stick to baseboards or furniture. Place them between your bed and bathroom door.
Make getting in and out of bed easier. A bed rail or bed cane provides sturdy support when sitting up or standing. These adjustable devices slip between your mattress and box spring, creating a stable handle exactly where you need it.
They’re particularly helpful for people with arthritis or reduced upper body strength.
Keep essentials within arm’s reach. Your nightstand should hold everything you might need at night: phone, water, glasses, and medications. A touch-control lamp eliminates fumbling for tiny switches in the dark.
Consider a digital clock with large numbers that displays both time and date. It is helpful for maintaining orientation, especially for those experiencing cognitive changes.
Clear the path completely. Remove all rugs between your bed and bathroom. Yes, all of them. That decorative throw rug is a tripping hazard, full stop. If you need warmth underfoot, use wall-to-wall carpeting or go barefoot.
Kitchen: Balancing Function and Safety
The kitchen presents unique challenges: you’re reaching, bending, carrying hot items, and standing on potentially slippery floors. Smart modifications maintain your ability to cook while reducing injury risk.
Reorganize for accessibility. Move frequently used items to shelves between waist and shoulder height. Reserve high cabinets for items you rarely need. This single change eliminates the dangerous combination of climbing step stools while carrying dishes.
Upgrade to stability-focused tools. Easy-grip utensils with larger, rubberized handles reduce hand strain and improve control. Lightweight pots and pans are easier to maneuver.
A kettle tipper lets you pour boiling water without lifting a heavy kettle. These aren’t expensive specialty items, most are available at regular kitchen stores for $10-30 each.
Improve task lighting. Under-cabinet LED strips illuminate countertops where you’re working with sharp knives and hot surfaces. Good lighting also helps you read recipes and medication labels accurately.
Consider strategic upgrades. If you’re replacing appliances anyway, front-loading dishwashers and refrigerators with bottom freezers reduce bending.
An induction cooktop automatically shuts off when you remove the pan, preventing forgotten burners. Touchless faucets eliminate the need to grip and twist handles with arthritic hands.
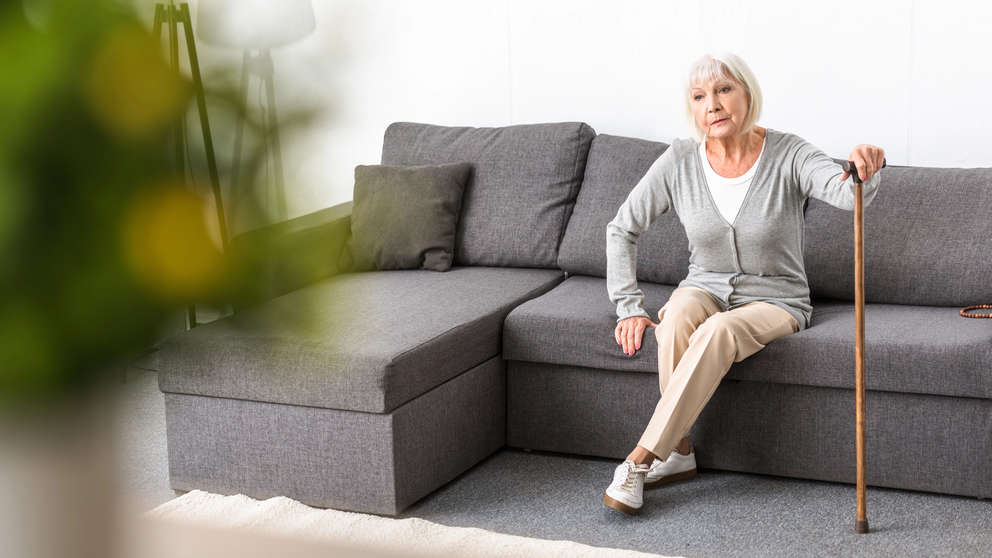
Living Room and Common Areas
You spend more waking hours here than anywhere else, making it crucial for both safety and comfort.
Choose the right seating. Chairs and sofas with armrests provide crucial support when sitting down or standing up. A recliner or lift chair with firm cushions (not too soft or deep) makes the transition easier.
The ideal seat height is 17-19 inches. Your knees should be level with or slightly lower than your hips when seated.
Address the rug situation decisively. Loose rugs are the leading cause of falls in living areas. Remove them entirely, secure them with rug grippers or double-sided tape, or replace them with wall-to-wall carpeting.
Area rugs might tie the room together, but not if you’re lying on the floor with a broken hip.
Create clear pathways. Arrange furniture against walls, leaving wide, straight paths between rooms. You should be able to walk from your chair to the kitchen without navigating around coffee tables or ottoman corners. Fifteen pounds of magazines on that side table? Find them a new home.
Organize your medications visibly. A medication organizer with clearly labeled compartments prevents dangerous mix-ups. Keep it in a well-lit, easily accessible spot where you’ll see it daily. Pair it with a daily checklist if you’re managing multiple medications.
Hallways, Stairs, and Transitions
The spaces between rooms often get overlooked, but they’re critical connectors that need attention.
Install proper handrails. Stairs need sturdy handrails on both sides, mounted 34-38 inches above the stair tread.
If you only have one rail, add a second. Being able to grip with both hands dramatically improves stability. Hallways longer than six feet also benefit from wall-mounted rails.
Make stairs more visible. Add bright lighting at both the top and bottom of staircases. Apply contrasting tape to the edge of each step. This simple visual cue helps your brain process where one step ends and the next begins, especially important as depth perception naturally declines with age.
Ensure transitions are smooth. Different flooring heights create trip hazards. If you can’t eliminate the height difference, mark it clearly with contrasting color and ensure it’s well-lit.
Motion-sensor lights in hallways mean you never walk through darkness, even when your hands are full.
Upgrade exterior entryways. Your front porch needs bright lighting, a non-slip outdoor mat, and a clear view of the threshold. If you have steps leading to your door, they need the same handrail and contrast-tape treatment as interior stairs.
Where to Start: A Practical Implementation Plan
Looking at this entire list can feel overwhelming. You don’t need to do everything at once. Here’s a realistic, budget-conscious approach.
Week one: free changes. Remove tripping hazards: loose rugs, extension cords across walkways, clutter from paths between rooms. Reorganize kitchen items to waist-to-shoulder height. Clear nightstand clutter.
Total cost: $0. Time investment: 3-4 hours.
Month one: bathroom basics ($200-300). Install grab bars by toilet and in shower, add non-slip bath mats, and install motion-sensor nightlights between bedroom and bathroom. These three changes address your highest fall-risk area.
Month two: lighting upgrades ($100-150). Add motion-sensor lights to hallways, improve stairway lighting, and install touch-control lamps in bedroom and living room. Good lighting prevents falls across your entire home.
Month three: stability aids ($150-250). Add bed rail or cane, install handrails on stairs if missing, secure or remove remaining area rugs, and invest in easy-grip kitchen tools.
This phased approach spreads the $450-700 total cost over three months while immediately addressing the most dangerous areas.
Compare that to one month in assisted living ($4,000-6,000) or the average hospital bill for a fall-related injury ($35,000).
Check insurance coverage. Medicare Part B may cover some modifications if deemed medically necessary. Long-term care insurance often includes home modification benefits. Even if coverage is partial, it’s worth the phone call.
Moving Forward
Creating a senior-friendly home isn’t about admitting defeat or giving up independence, it’s about protecting it. Every grab bar installed, every loose rug removed, and every light added extends the time you can safely live in your own home, on your own terms.
The connection between a safe home environment and overall wellbeing runs deeper than just preventing physical injuries. When you feel secure in your space, your cognitive health improves, anxiety decreases, and you maintain the confidence to stay active and engaged. A home that supports your physical safety also supports your mental and emotional health.
Start with one room this week. The bathroom is statistically your best choice, but any progress is good progress. You’re not just preventing falls, you’re preserving independence, dignity, and the comfort of aging in the home you love.